Grouping is one of my most used features in DaVinci Resolve, especially in bigger projects where grades organization is a must. I use the grouping for two reasons:
- Categorizes the clips into logical groups,
- Makes grading similar clips fast and easy.
I use groups in different ways, but the most common scenarios are:
- Group by a camera, when the clips were shot using multiple cameras,
- Group by a shot – close-ups, medium shots, long shots,
- Group by a location
Managing Groups
Let’s create the first group. To do that right click on the clip you wish to add to the group and select Add Into a New Group:

Now, there’s an indication that the clip belongs to a group:

Type in a group name and continue…

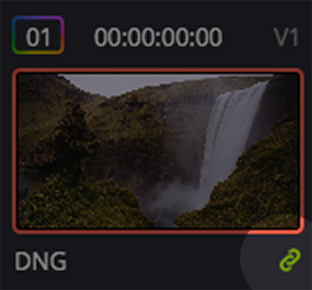
The green link in the right bottom corner will appear next to each clip that is assigned to any group.
Now, when we right click on any clip a context menu allows us to select the group that we have just created, and there are a couple of options:

- Assign to Group – this way we assign any clip to a particular group. Right click a desired clip and select this option.
- Load – might be confusing, but it just selects the group as current (doesn’t change anything for the selected clip).
- Rename – renames the group.
- Delete – deletes the group and all the corrections made for the particular group.
When a clip is assigned to a group there are 2 additional fields in the combo box above the nodes:

This is where the magic happens. What they are and how to use them is explained in the next section.
Group Node Editors
I think that the best explanation is the visual one, so I created a simple graph that you can see below:

It shows the timeline with 4 clips on top. Then the signal goes through the Pre-Clip editor, which is common to every clip in the timeline and all the changes made there affect all the other clips. Then the signal splits into all the Clip node editors (every clip on the timeline has it’s own). Another common nodes are found under Post-Clip and then Timeline.
- Group Pre-Clip – changes made in this area are propagated to all the clips in the group and are applied to the clip first (before the changes in the Clip editor);
- Clip – this is the main node editor available for any clip in the timeline. This area is specific to the node and any custom changes should be made here;
- Group Post-Clip – similar to Group Pre-Clip but the changes are applied after the Clip corrections are applied;
- Timeline – not directly related to Groups, but in case you were wondering it’s the global Nodes Editor available in all the clips (also in the clips not assigned to any groups) and corrections made in this editor propagate changes to all the clips in timeline.
Saving Stills from a Group
When I want to save a still to my gallery from the current grade and the current clip is in the group, then the thumbnail of the saved still will contain all the grades (pre-clip, clip and post-clip), but the actual grades stored in the gallery under this still will be only the ones from the current Node Editor (if we are in pre-clip node editor, only the nodes from that editor will be saved in the gallery).
To save all the corrections in the gallery use Collapse group grades described below.
Collapse Group Grades
This is a cool feature that flattens the group corrections to the Clip Node Editor level. This means that all the nodes from Pre-Clip will be inserted before all the existing Clip nodes, and all the nodes from Post-Clip will be appended after the existing Clip nodes.

This is useful when I no longer want a particular clip to be in the group but I want to keep all the corrections.
I also use this to save still in the gallery as a preset for further grades.
The Bad
Although groups give me flexibility and natural categorization of my clips in the timeline there’s but — the only disadvantage I find when using groups.
Group Pre-Clip and Group Post-Clip node editors don’t support caching. This means that placing heavy OpenFX plugins in the mentioned sections will slow down the performance and there will be no way to get the smooth playback back.

Everything is just fine so long as I use LUTs and built-in corrections.
There’s a partial fix for that though. We can enable Output Cache and still get the realtime playback.

Any change in the clip will break the cache obviously, but as long as we don’t touch the clip, it plays back instantly just fine.
Summary
Using groups in DaVinci Resolve might give you lots of benefits and speed up the workflow, but should be applied from the very beginning. Trying to split existing project into groups and extract the common nodes to Pre-Clip or Post-Clip might be impossible. Give it a go and see if it works for you.