- Is Magic Lantern stable enough to use it in a commercial project?
- Is it worth spending so much more time in RAW processing instead of simply using h.264 internal codec?
- Is it possible to shoot on location with just two 64 GiB CF cards that hold around 11 minutes of RAW footage each?
- How to manage hundreds of gigabytes of data while shooting?
In this post I will try to answer those questions by describing you how I shot a music video using Magic Lantern on my Canon 5D Mark III.
Location
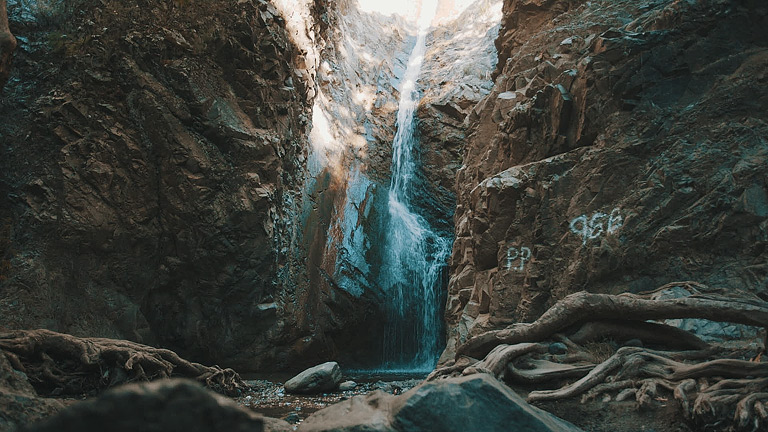
The location was quite difficult exposure-wise, to say the least. The sun rays were hitting the place only for a few hours around noon, behaving like a spot light getting through the trees. Strong mediterranean sun was creating lots of contrast between deep shadows and very harsh highlights.
Without RAW it wouldn’t have been possible to capture the dynamic range of the scene.

Second location for the clip was in direct sun so we had to wait for the sun to go down and shoot during the sunset.
Gear
The whole music video was shot using the following equipment:
- Canon 5D Mark III
- Samyang 35mm T1.5
- Canon 24-105mm f/4 VR
- Samyang 85mm T1.5
- Tripod, slider, Glidecam HD 4000
- 2x 64 GiB Komputerbay CF cards
And last but not least, the 2 most important accessories helping me out with the difficult lighting conditions:
- LCW Fader MK II
- 120×80 5in1 Reflector
Workflow
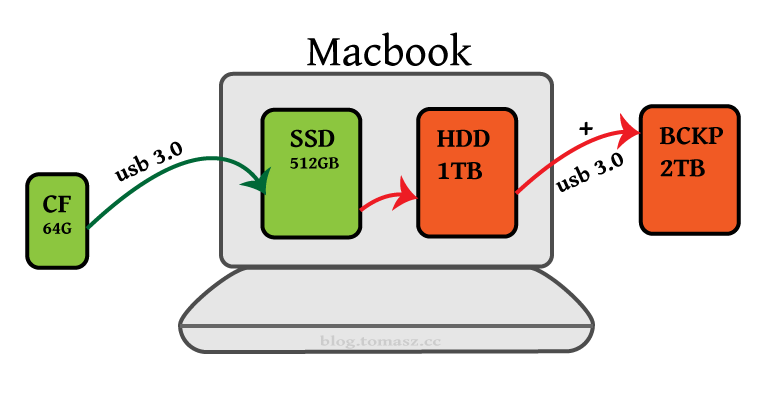
At the location I was also using my MacBook Pro 15” to dump the footage from the cards. To extract DNG files directly from CF card I plugged it into Lexmark USB 3.0 card reader and processed all the files with MlRawViewer. As an output drive I used internal SSD to make the offloading quick. Then I would move the DNG files to internal 1 TB drive to make some room on SSD for the next footage.
Using this technique I was able to shoot continuously for 10-11 minutes, swap the cards and shoot again. I had to keep track of the remaining time on the card so that I wouldn’t
run out of space in the middle of the important take.

During longer breaks I was connecting the LaCie Rugged 2TB USB 3.0 drive and was doing the backup of the footage.
Another benefit of using MlRawViewer was a quick preview of the footage allowing me to make sure that nothing was broken, and there were no pink stripes or write errors on the CF cards (which occasionally had happened before on earlier versions of Magic Lantern).
Magic Lantern
Enabled modules and features:
- MLV
- MLV sound
- focus peaking
- histogram
- 1920×1080 @ 25p
The most crucial settings in Magic Lantern are shown below:

Keep in mind that overlays during the recording slow down CPU and increase the risk of dropping frames. I would have loved to have focus peaking while shooting, but the reliability was more important here.
I didn’t use any other ML features such as HDR or DualISO not to degrade the quality in any way and most of the takes were exposed well enough to get all the details out of the RAW files.
MLV Sound was enabled to allow me to sync the music in the post production easily. We were playing the song from the macbook and recording the backing track using Rode VideoMic Pro to get better reference sound than the internal 5D audio recorder (the stream from the waterfall was making quite a lot of noise).
Stability
Magic Lantern didn’t crash at all.
The camera didn’t freeze, not even once.
None of the MLV files was damaged.
No pink stripes, no green tint.
I didn’t experience ANY problems at all during the whole shootout.
I was able to record throughout the whole 4 minute song in one take. The longest take was over 5 minutes and it was stopped by me (not by ML).
The only issue I found was when I ran out of space on the card and ML stopped recording, the wav file was not complete (it was a few seconds shorter than the video file). And this wasn’t a problem for me at all since I was recording only the reference audio to be able to sync it later to the original song.
The light
As I mentioned in the Location section, the lighting was difficult. Especially for the wider shots, where the dynamic range of the scene was really wide. I was trying to shoot medium shots and closeups when the light was strong – I could use the reflector to even out the shadows and reduce the contrast. For wider shots I had to wait for a cloud to cover the sun partially.

This way I could capture interesting light without the highlights being completely blown-out and before the light was gone leaving a very flat looking place.
Postproduction
When the shooting part is done we need to switch to postprocessing mode. The complete workflow for processing almost 1TB of RAW footage will be described soon in another post, so stay tuned and subscribe not to miss it!
Warning
Please note that I DO NOT recommend using Magic Lantern for professional work unless you are 100% sure you can put the project at risk. My preparation consisted of weeks of thorough testing the firmware and making sure I could rely on it. Every version of the firmware can introduce new bugs and destabilise the camera completely.
USE AT YOUR OWN RISK.
Next Parts
- Part 2 – editing
- Part 3 – grading (in progress)