July 2, 2026
Inside the Scopes:
"I need them all."
That's Darren Mostyn's answer when we ask which scope he could live without.
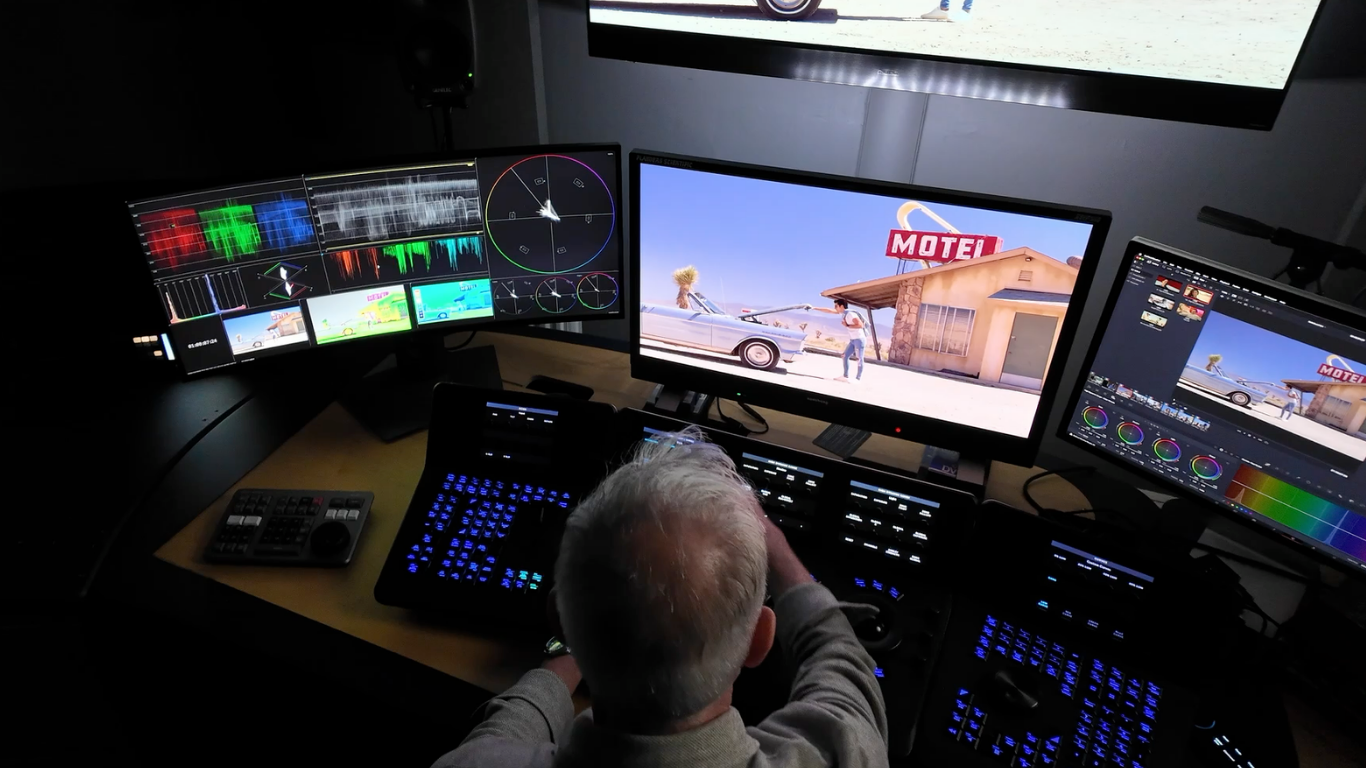
After two decades of grading everything from broadcast to commercial work, Darren knows exactly what earns a permanent place on his monitor. We sat down with him to walk through his Nobe OmniScope layout and explain how he uses custom scopes to balance skin tones, read shadows, and why he believes TwinPeaks is one of the most overlooked tools available.
When we asked Darren why he uses OmniScope, he didn't hesitate.
"The customizability. It's given me many more scopes than what are available in DaVinci Resolve."
It's not that Resolve's built-in scopes are lacking; Darren trusts them. What OmniScope adds is flexibility. More scope types, more control over how they're displayed, and the freedom to build a workspace that matches the way he grades.
His current layout is saved as a preset that brings together everything he needs in one glance: a vectorscope split into shadow, midtone, and highlight ranges, a False Color display with a skin tone indicator, a shadow waveform focused on the bottom 15% of the signal, and the TwinPeaks scope.
Even the brightness is intentional. Rather than competing with the image, Darren keeps every scope dimmed down on his 32-inch ultrawide monitor.
"I just need to read the level of it. I don't need to see them bright."
This is the part that's hard to find anywhere else: not scope marketing, but how a working colorist actually arranges his signal reads. Here is Darren's preset, row by row.
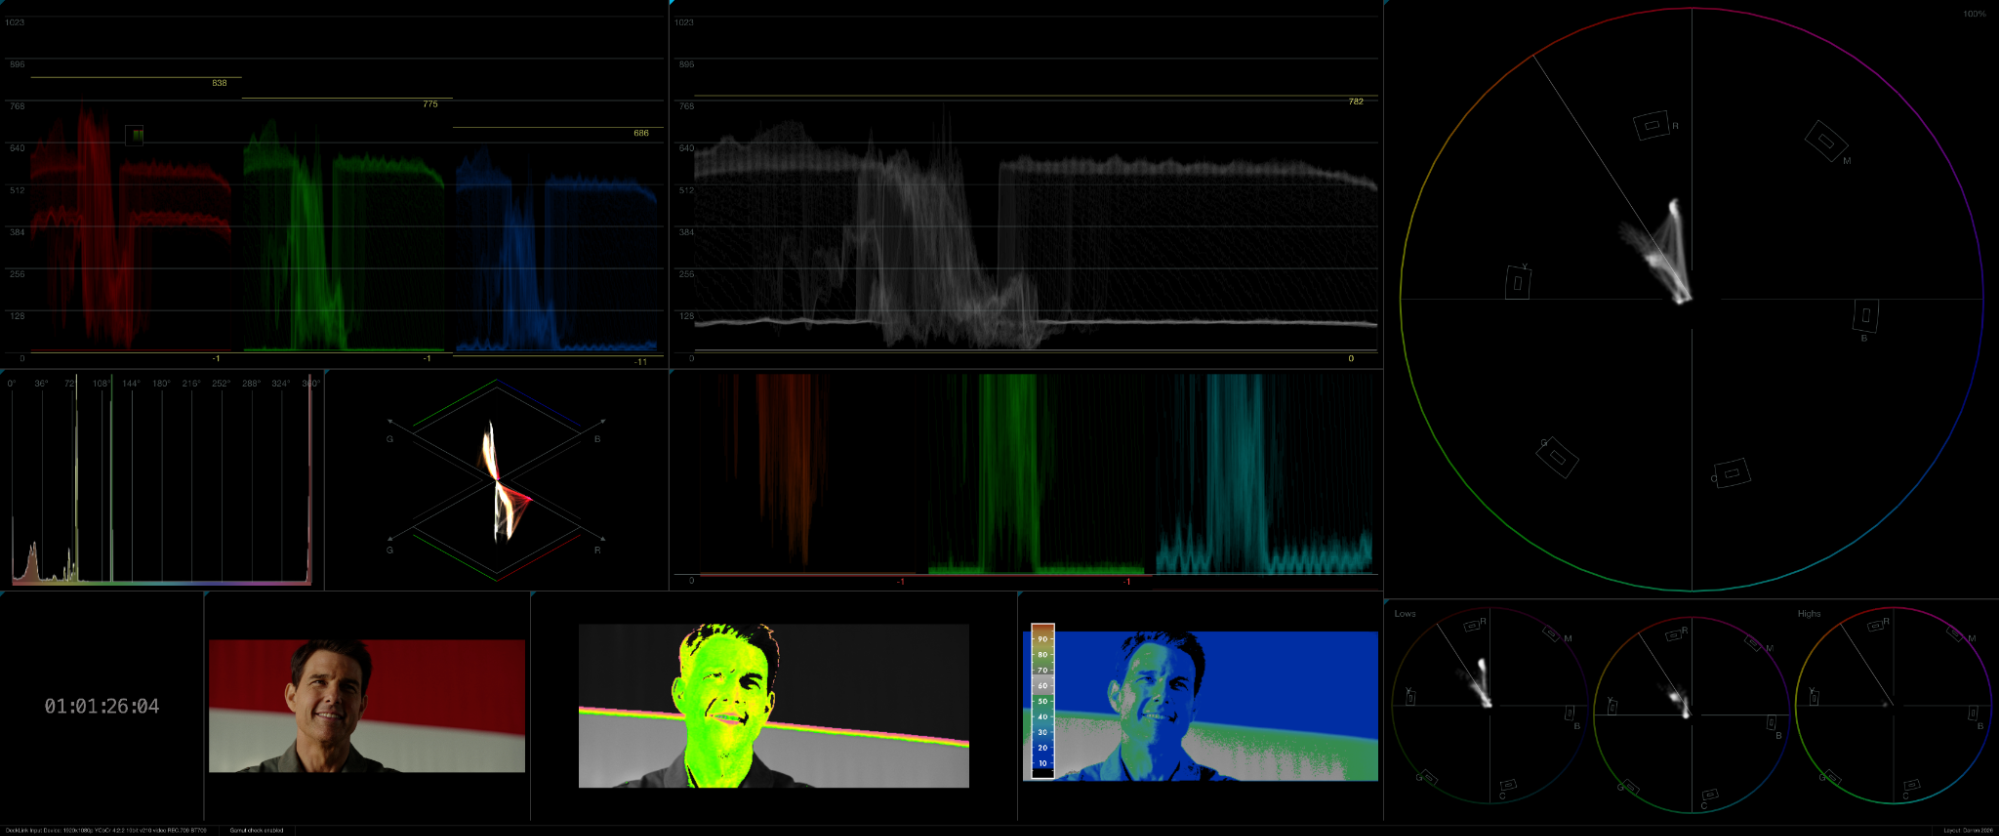 Darren's saved OmniScope preset
A lot of the conversation centred on skin tone, specifically on how Darren uses False Color and the vectorscope's skin tone indicator together.
His approach starts with False Color to get exposure in the right ballpark. He uses the Flanders preset, looking for skin highlights to sit in the region around 55 to 65 on the IRE scale (the gray band on the chart), while keeping the majority of the face a little lower, closer to 35 to 50.
"I'm trying to set my skin tone level so it's sitting somewhere around 35 at its lowest, going up to 55 to 60."
Once exposure is where he wants it, he shifts his attention to the vectorscope's skin tone indicator.
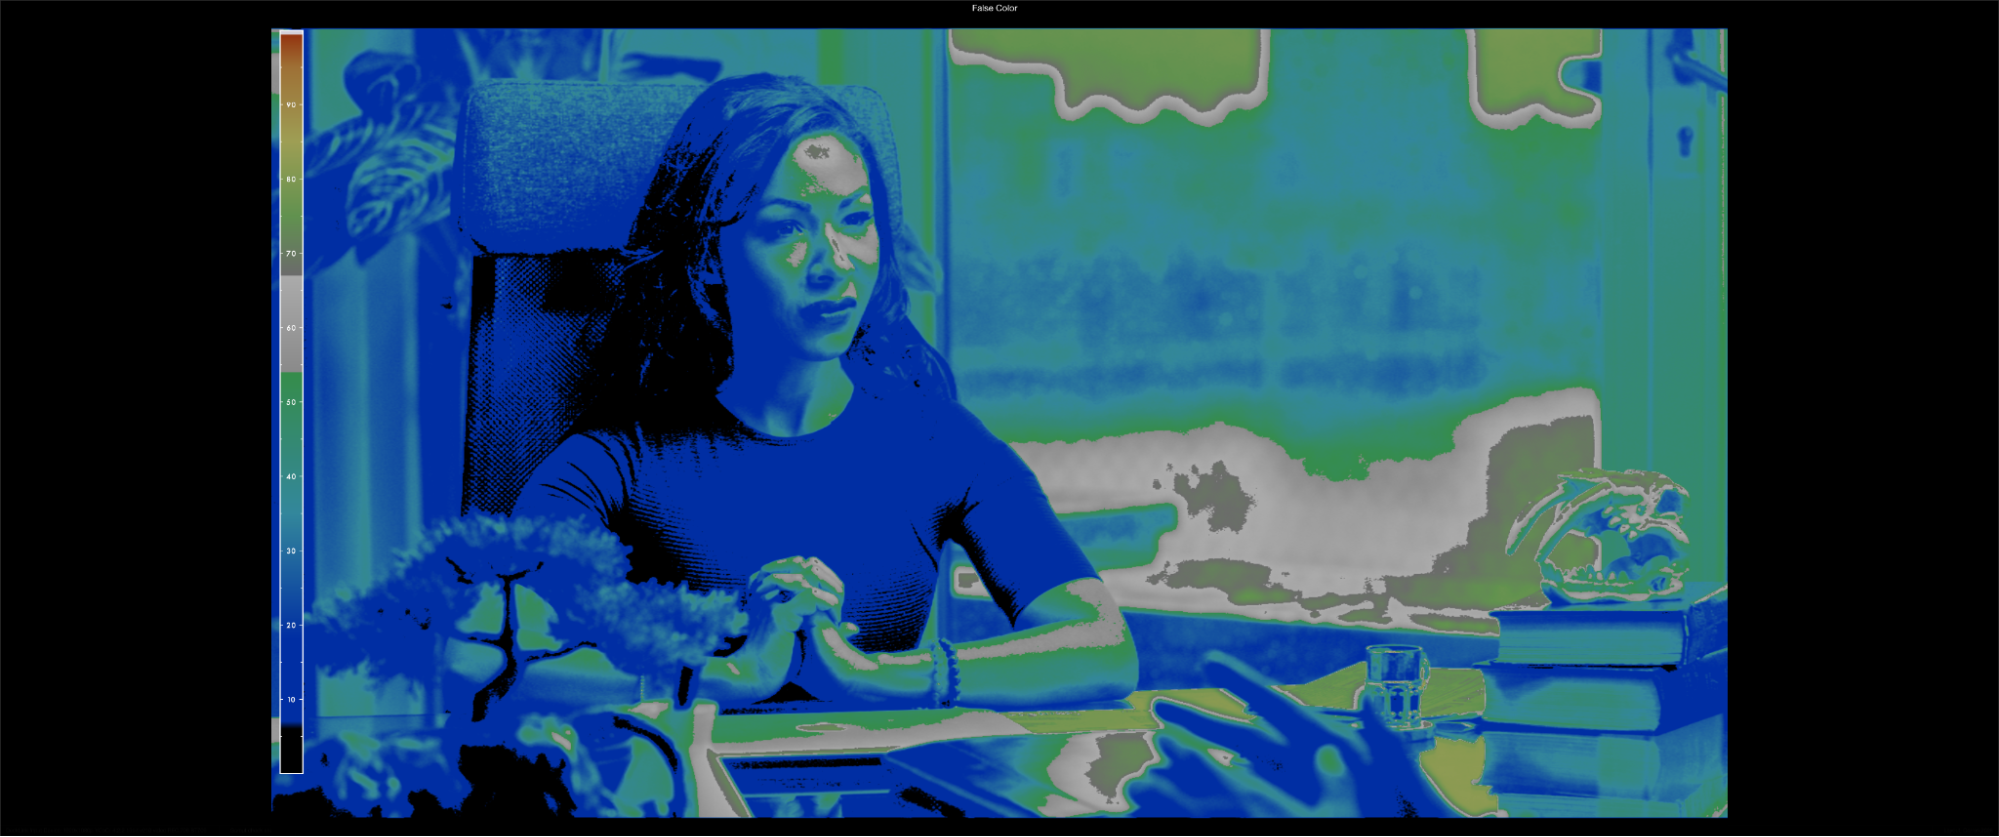 False Color first, to get exposure in the right ballpark
Here's where many colorists get caught out. Rather than trying to place every skin tone directly on the famous diagonal line, Darren focuses on consistency. Whether the image naturally sits just above or just below the line matters less than making sure it stays there throughout the grade.
Pulling up several film references, including Top Gun and Her, he shows that beautifully balanced skin often sits slightly below the line, leaning just a touch towards green.
"People think you have to sit on that line. You just have to be consistently under it or over it."
Once exposure and color balance are established, the scopes step into the background.
"I'm not grading by scopes. It's a creative decision at that point."
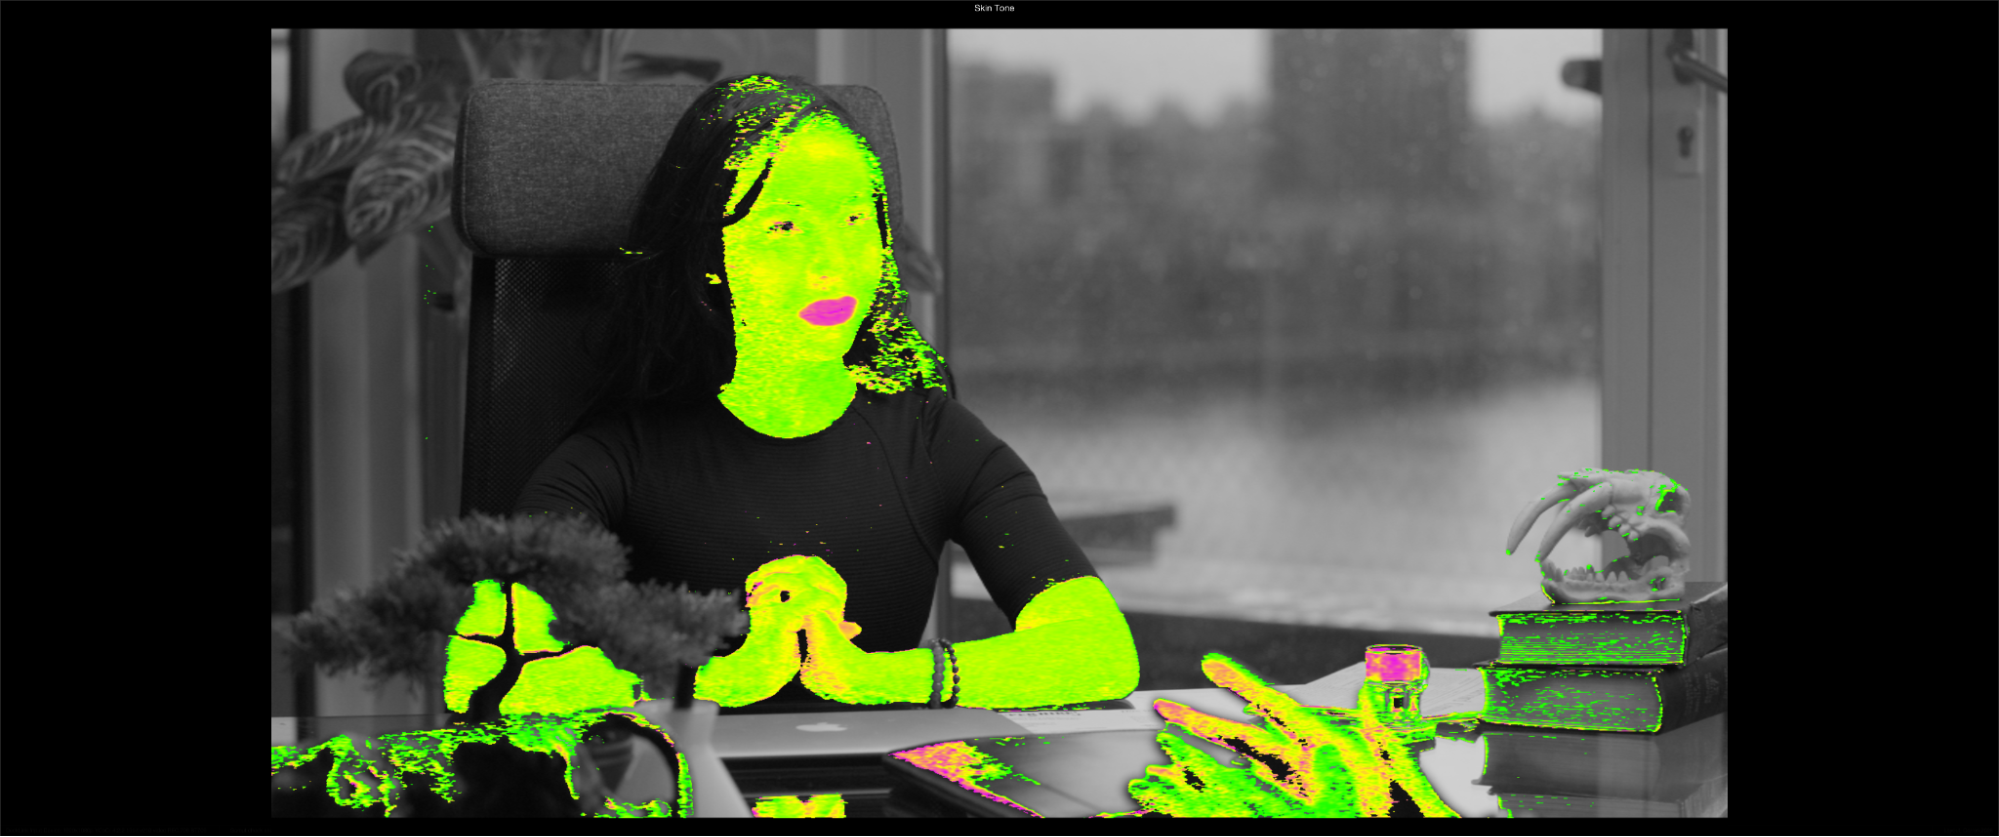 Then the skin tone read, checking for consistency rather than chasing the line
The scope Darren said he uses most in daily work is the bottom 15% shadow waveform: a standard RGB parade, windowed down to just the darkest region of the signal.
"I can't do this in Resolve. Well, I can, but not like this."
The scope shows him exactly what's happening in the red, green, and blue channels in the darkest part of the image. When he's balancing blacks, he lines the three channels up. When he wants to push color into the shadows, he watches the channels separate. When something's clipping, he sees it immediately.
During our session, he demonstrated the workflow by spotting a slight green cast in one shot, lowering the green shadows using Resolve's Log controls, then adding just a touch of cool by pulling down the red channel.
"It's just a nice little bullseye view into the shadows straight away."
He called it one of his most-used tools. Simple concept, but the ability to isolate just that region and customize the gain so it reads clearly without dominating the layout is what makes it practical in a real grading session.
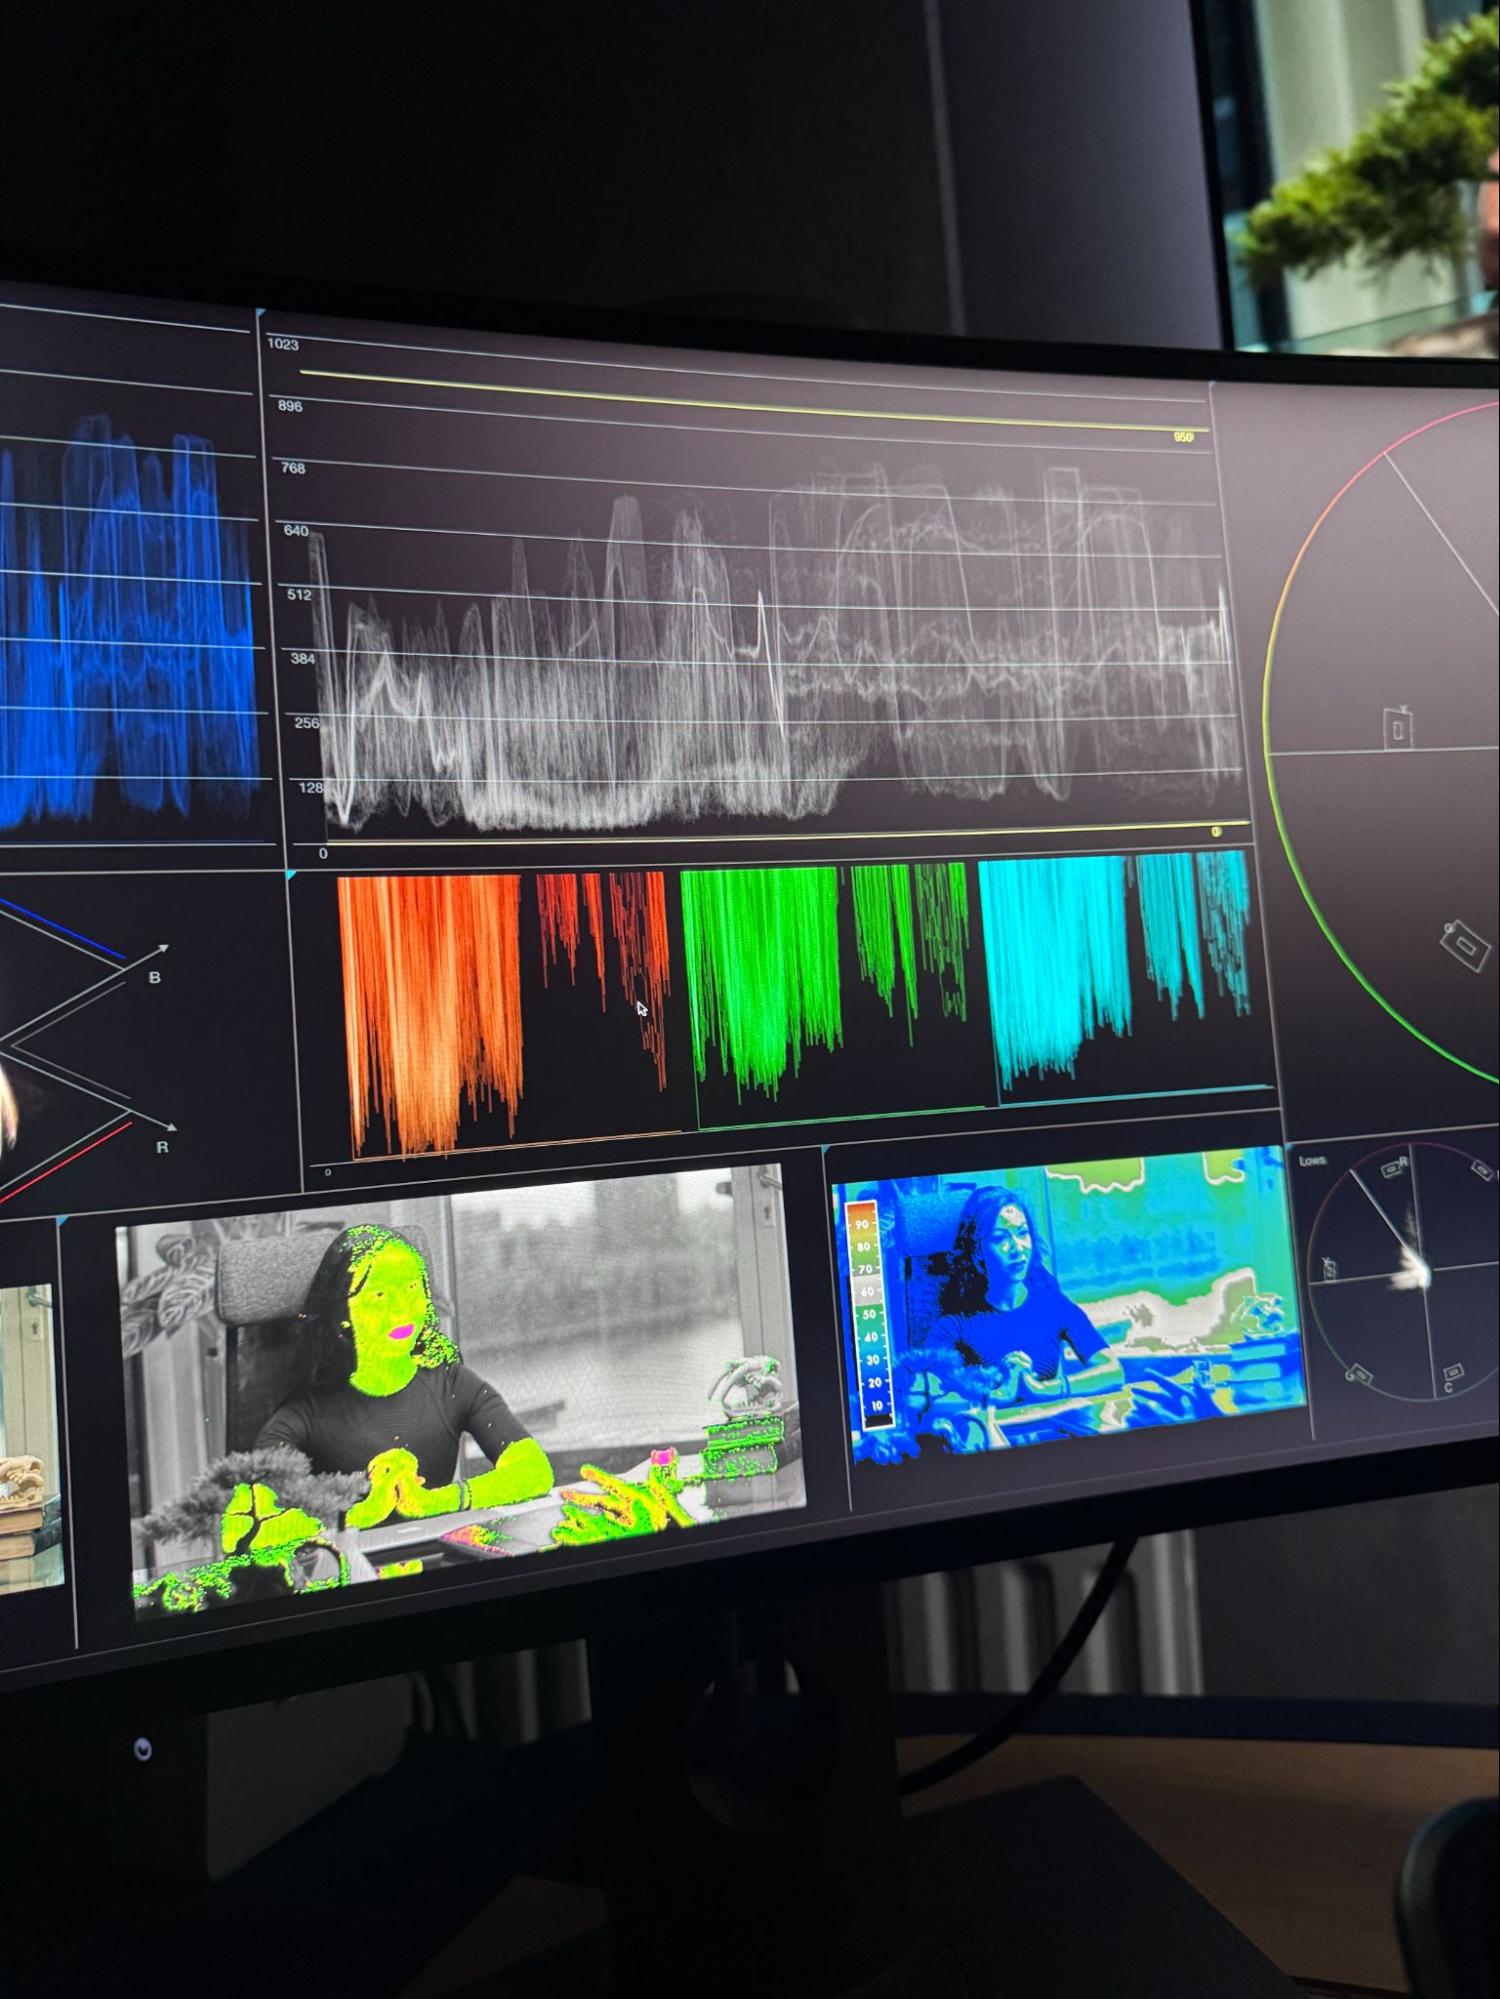 RGB parade windowed to the low shadows
Towards the end of the session, Darren switched to TwinPeaks.
TwinPeaks is a double-diamond scope built around the relationship between the RGB channels. The upper diamond plots green against blue, and the lower diamond plots green against red, so instead of reading brightness or a single hue, you're reading how the three channels sit relative to one another. That makes it a fast way to judge white balance, channel separation, saturation weight, and gamut excursions in one view.
As Darren walks through the scope, the patterns become surprisingly intuitive. Neutral images produce clean vertical lines. Increasing saturation causes them to fan out, while a color shift rotates the pattern around the display. Remove all color and you're left with a single vertical spine down the middle.
"The more straight those lines are, the more natural white you've got going."
He used it to confirm a shot was balanced, then to quickly show what happened when he pushed hue to extremes and the diamonds leaned off-axis.
His verdict?
"It's probably quite underused, actually."
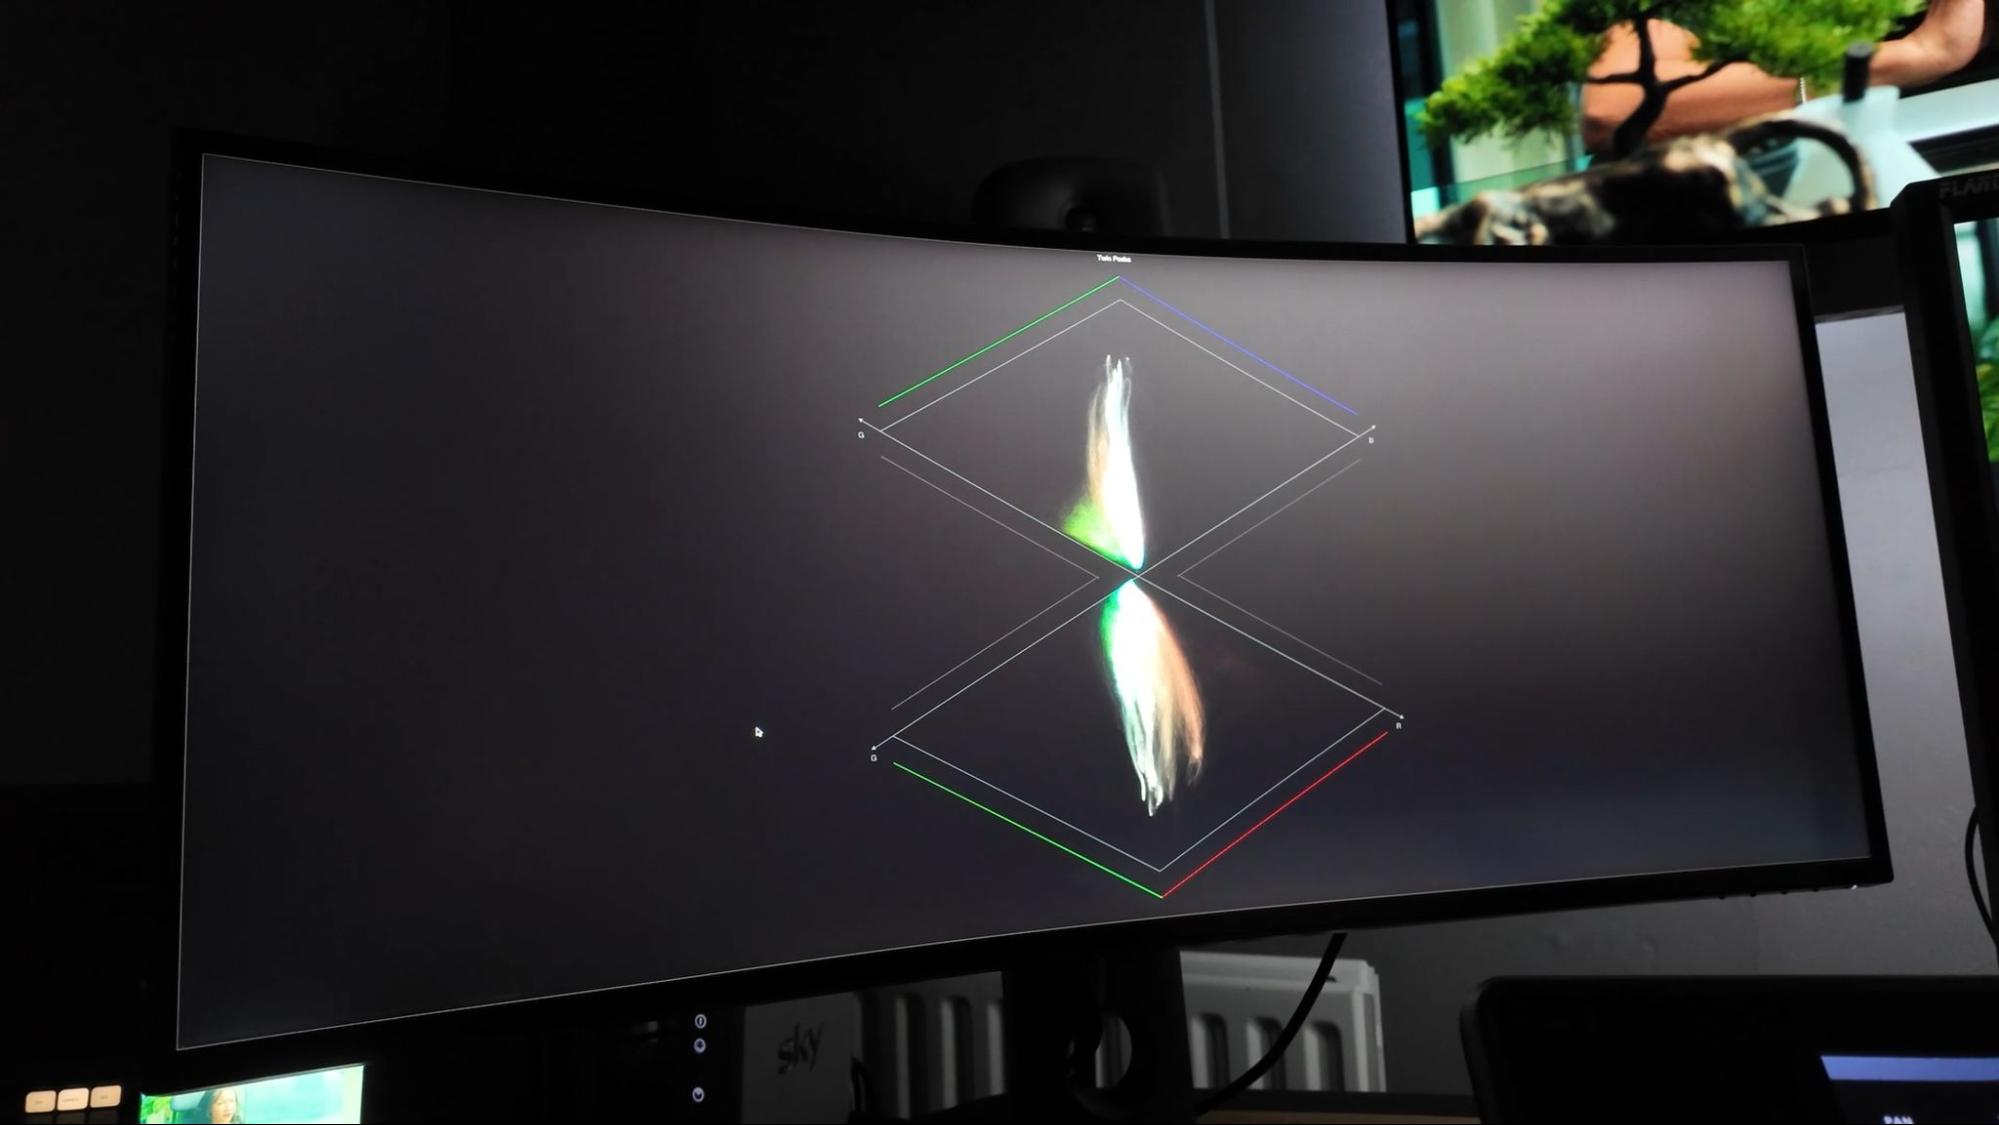 TwinPeaks: reading channel balance at a glance
So we asked Darren one final question. After twenty years of grading, if he could only keep one scope, which would it be?
He smiled.
"I need them all."
Each one plays a different role.
"If I'm doing saturation work, I want my vectorscope. False Color, I love it, I don't want to lose it. The shadow waveform, I use that all the time."
The closest he came to letting go of anything was the histogram ("although I like that as well") and the timecode display.
Which feels like a fitting answer. For Darren, the value of OmniScope isn't replacing one tool with another. It's having every signal read exactly where he needs it, ready the moment he looks away from the image, without ever replacing the creative judgement that comes first.
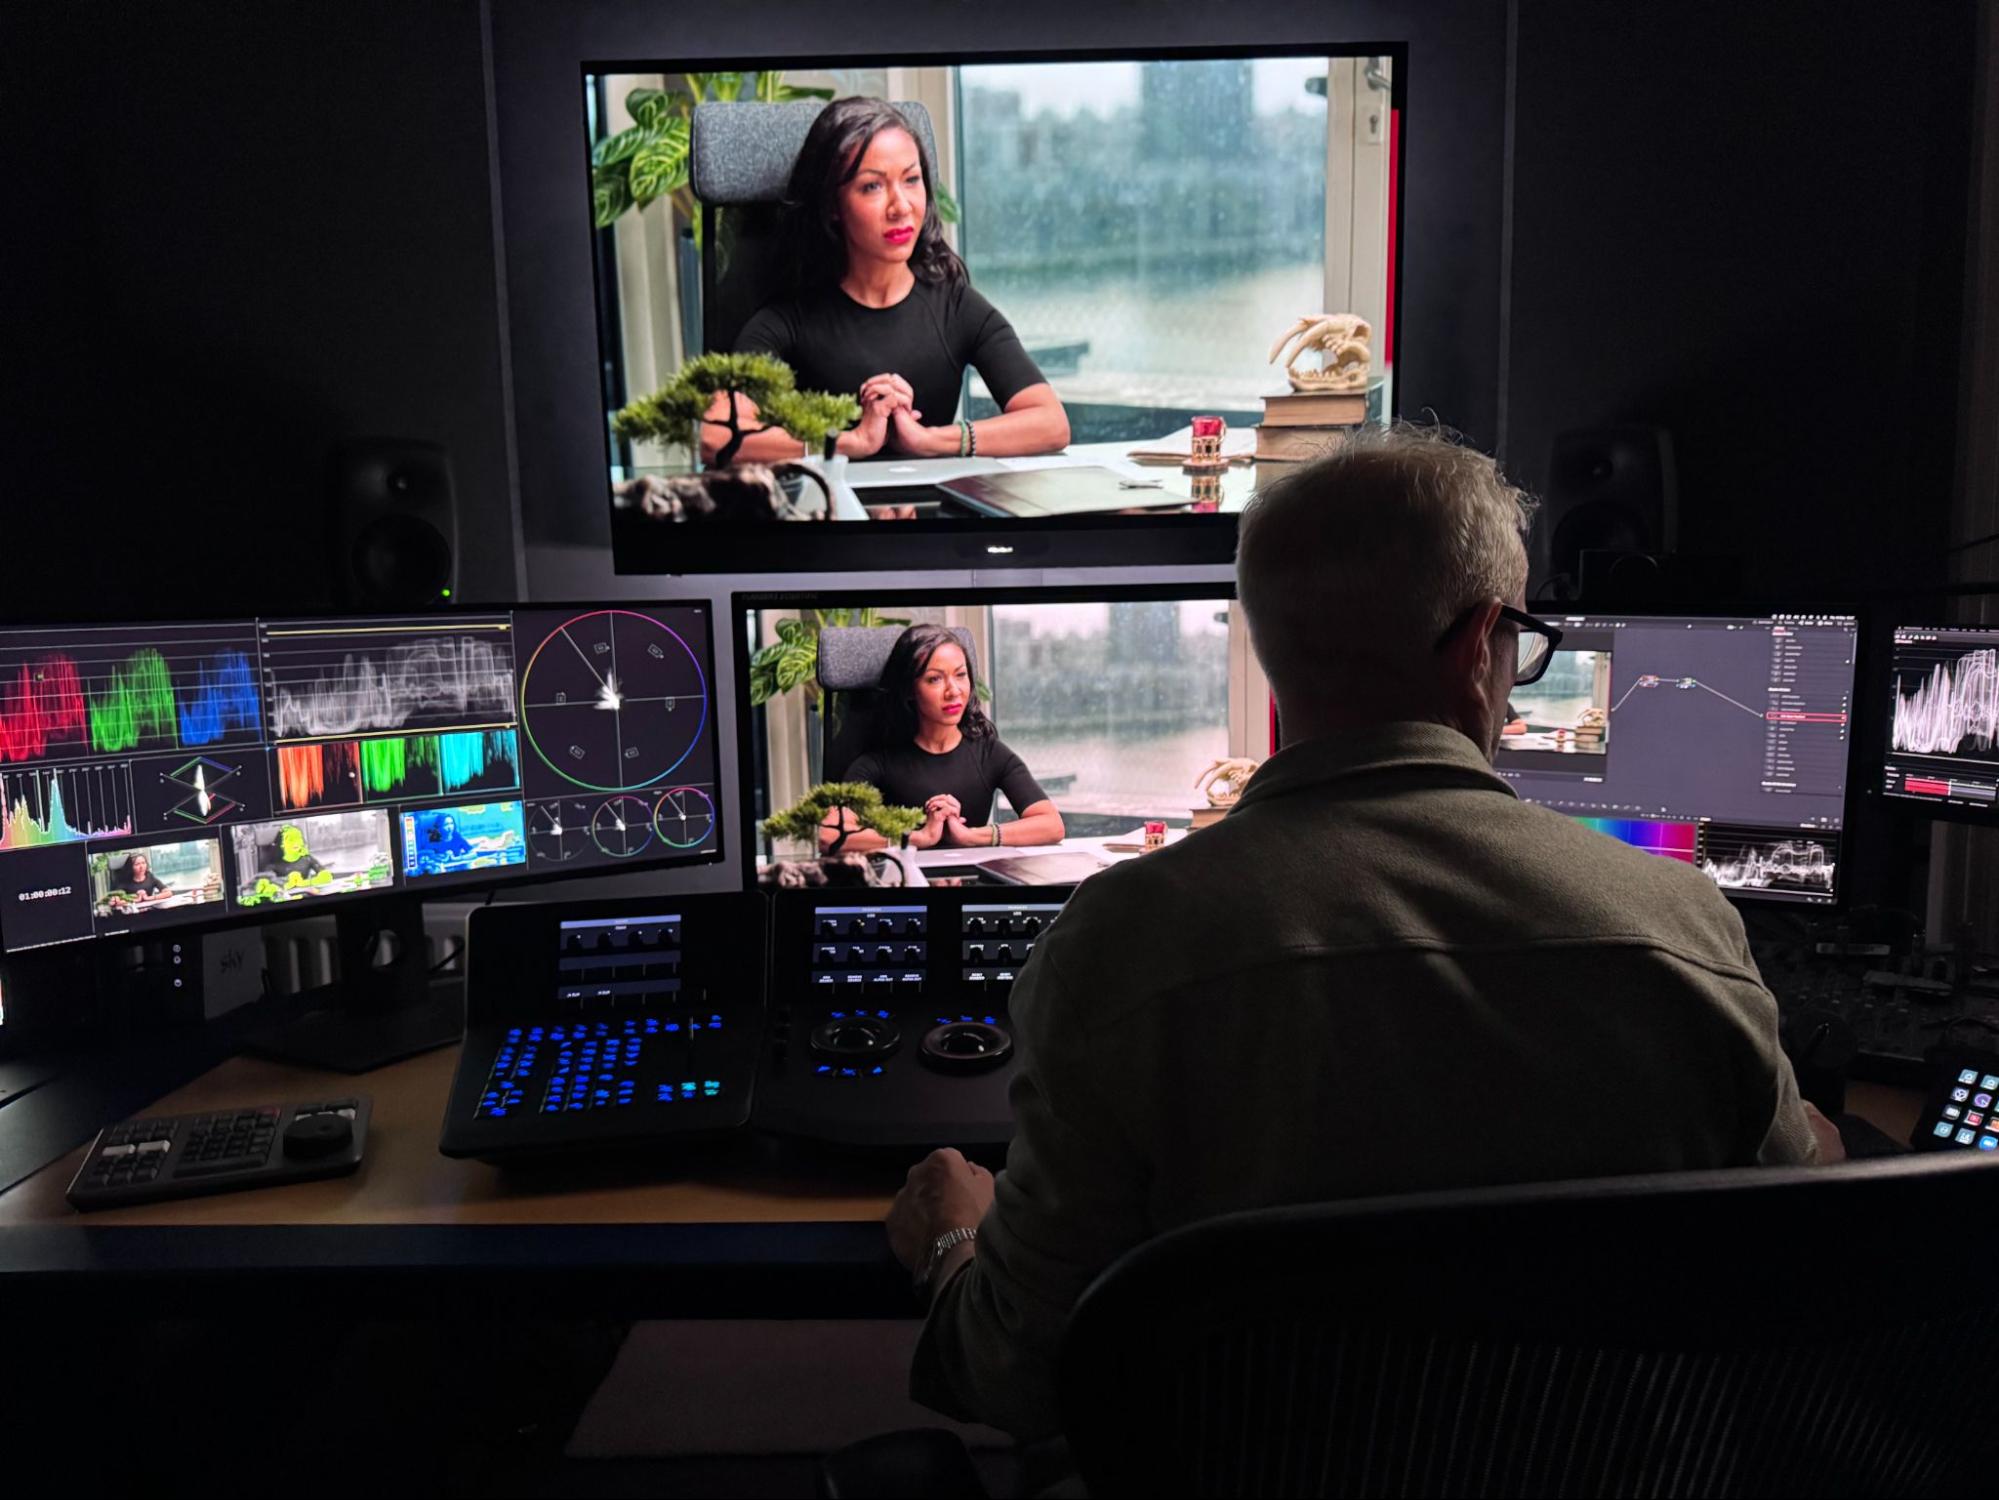 Every signal read, exactly where he looks away from the image
Watch the full interview below: