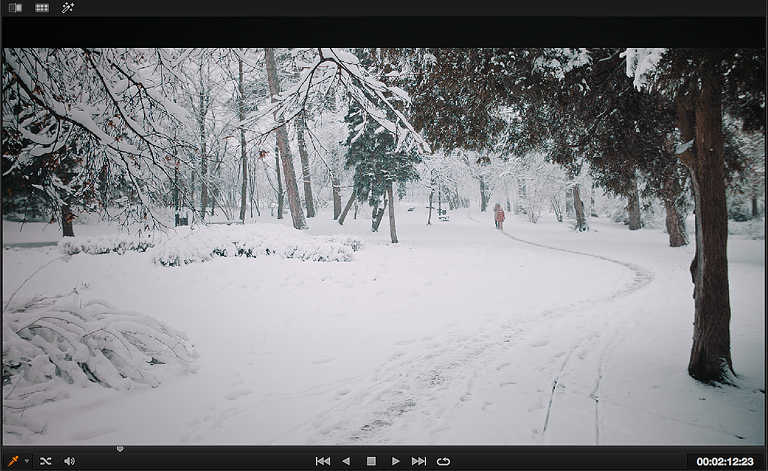
A few weeks ago a real winter finally came. I couldn’t resist and I went for a walk to the nearby park with my Blackmagic Pocket Camera to shoot some clips.
Everything was shot on Blackmagic Pocket Cinema Camera (handheld) with Sigma 18-35 f/1.8 and Canon 24-105 f/4 VR (both with Metabones SpeedBooster). I used variable ND filter as well not to close the lens too much. Output format was set to RAW.
Graded in DaVinci Resolve with a small touch of FilmConvert.
It was a good weather proof and low temperature test. It was about -5 degrees Celsius, and as soon as the snow hit the camera body and the lens it started to melt, making it a bit wet. No problems whatsoever. The only issue I had was the battery life. They don’t last long in good conditions and I think they were even worse in the low temperature. I didn’t want to drag the battery pack with me so I was replacing internal batteries until I drained all of them (6 total).
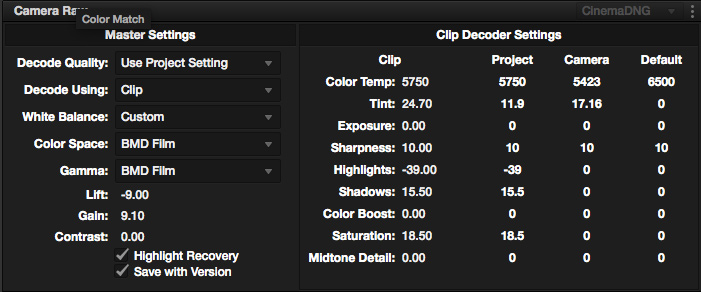
Here are a few screenshots from DaVinci Resolve to show how it was color corrected and graded:


First step is to normalize all the clips to the same exposure levels, to set the same contrast and saturation levels. All the initial steps are made in the CameraRAW panel in order to be able to recover any critical information, in case footage was over or underexposed too much.


All my clips were assigned to one particular group where I made all my common corrections and all the custom grades, contrast and exposure corrections were done in the Clip section for every individual clip.
Noise reduction was applied at the clip level mainly because it’s the heaviest plugin in the whole chain and it drastically slows down the playback. Putting it anywhere but in the Clip section would remove it from the caching process, and I wouldn’t be able to achieve realtime playback. You can read a bit more about caching in resolve in one of my previous articles as well as a few tips how to improve DaVinci Resolve performance.

FilmConvert settings
Group nodes were used to create a look. Pre-Clip contains a Look up table and some minor color corrections, the Post-Clip section sharpens the clip a bit, enhances the greens and prepares the tones for the final plugin which is FilmConvert. Contrast and the color settings of the plugin are very subtle and the grain is set to 45% which adds some detail back after the noise reduction in the darker areas (trees in the shadows).