The default project settings in DaVinci Resolve won’t be ideal for everyone. I used to change many of them first thing before importing any clips to the project. At some point, I was doing it automatically without thinking about it. My hand clicked appropriate sections and options one after another.
After some time I realized that I can save all these steps into project settings preset. I created a few of them specifically for the types of projects I work with and each time I create a new project it saves me some time.
In this post, I would like to show you my common settings in my presets with a brief explanation.
Creating a Preset
Here you can see the presets I created:

The first thing I set up in the project is the frame rate. Keep in mind that this cannot be changed later and should be your initial set in setting up a project. I created a few presets for various frame rates I use (I live in a PAL country).
Here are the fields that should be changed:

I also set up Conform Options Assist using reel names from the in order to avoid some roundtrip problems with the Premiere Pro:

I usually work with the footage from Blackmagic cameras so I also set up some of the default settings in the Camera RAW section:

Most of my projects end up on the internet and this is why I usually use sRGB Timeline Colorspace. This helps me avoid some gamma shift issues and the image I see is in the same color space as the exported clips.

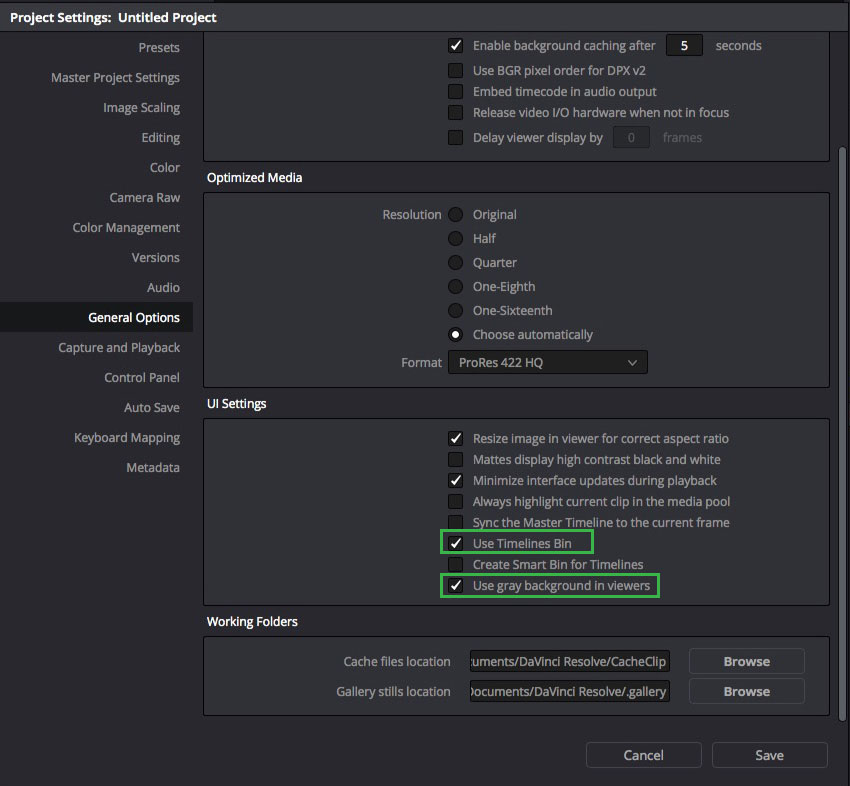
In the general options, I select use Timelines Bin and Use gray background in viewers. The former one helps me organize my media and my timelines are not mixed up with the footage. See the difference between this option and Create Smart Bin for Timelines below. The latter one makes it easier to work with the Output Blanking – I know exactly when the footage is and where the window background is. Otherwise, it’s not clear.

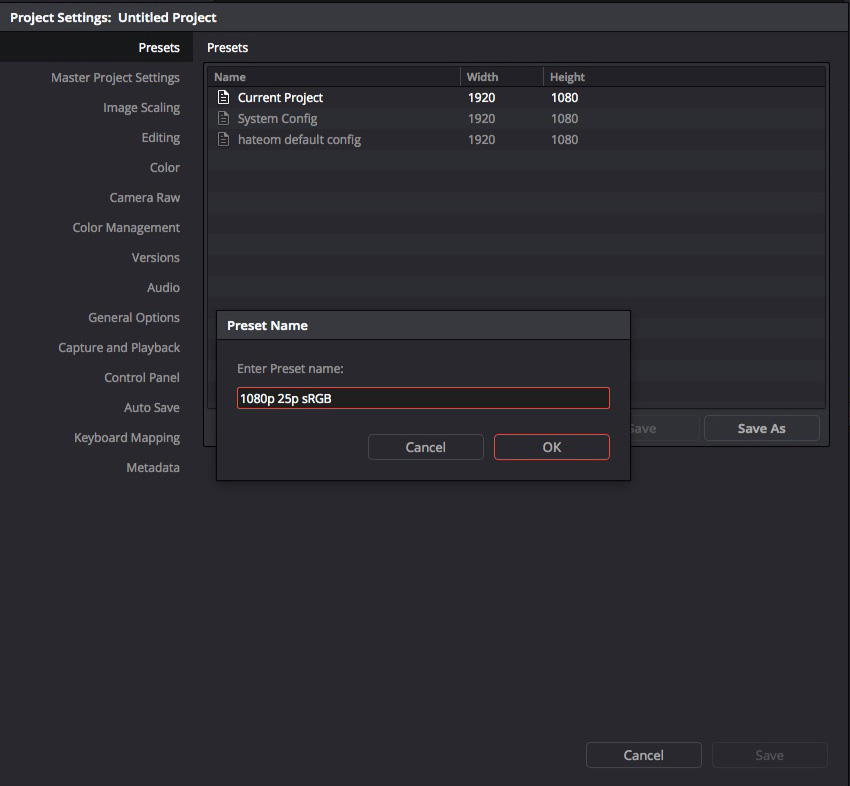
When all the settings are set we can save the preset by selecting Save As in the Presets tab:

Timelines bin or smart bin
Below you can see the difference between the Timelines Bin and the Timeline Smart Folder:
Timeline Bin creates a special place just for the timelines. Smart folder just groups them in one place but they still coexist in the same folders together with the clips.
I personally prefer the separation and use the first option.
Summary
Maybe it’s not a big Resolve’s feature but definitely can save some initial time we spend setting up a project. I love automation and a bunch of predefined presets help me move faster without worrying about the same stuff over and over again. If you haven’t used the presets before I hope I have just convinced you!